
PixMMO · Wiki
Play freeRaids Guide
Raids are big boss fights for up to 15 players. They fight automatically: every raider acts on their own according to their role, and the whole party watches the same battle live. Win, and the team opens one shared Raid Chest.
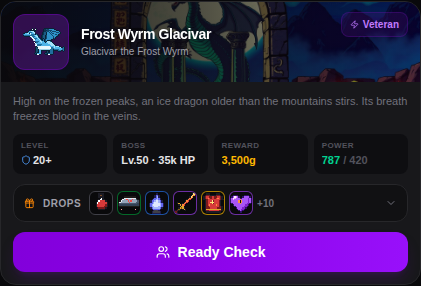 A Raid on the Raid page: level, boss, reward, your Power and its drops
Choosing a Raid
Open the Raid page. Each raid shows:
- Difficulty — Novice, Adept, Veteran or Mythic.
- Level — you need at least this level to enter. Raids you can't enter yet are listed at the bottom.
- Boss — its level and HP.
- Reward — the boss's Gold.
- Power — your Power next to the recommended Power. Green means you're ready.
- Drops — open the list to see every item and pet egg it can drop, with your chance.
One raid is highlighted at the top as Recommended. Sort the rest by level or reward.
Raid Keys
Every Raid needs its own key (for example the Slime Pit Key or the Hollow Throne Key).
- The party leader must carry the key. It's used up when the Raid starts.
- Keys drop from monsters and travel steps in the zone that matches the boss's level. The harder the Raid, the rarer its key.
- Keys stack, and you can trade them or buy and sell them on the Marketplace.
- Each key has its own wiki page in the Raid Seals category, with the zone it drops in.
Entering
- Solo: press Enter Raid (or Solo Raid on the Party page). A one-person party is made for you.
- With a party: the leader presses Ready Check. Everyone sees the lobby and marks themselves Ready. The leader can start any time, even if not everyone is ready.
- Everyone enters at 100% HP.
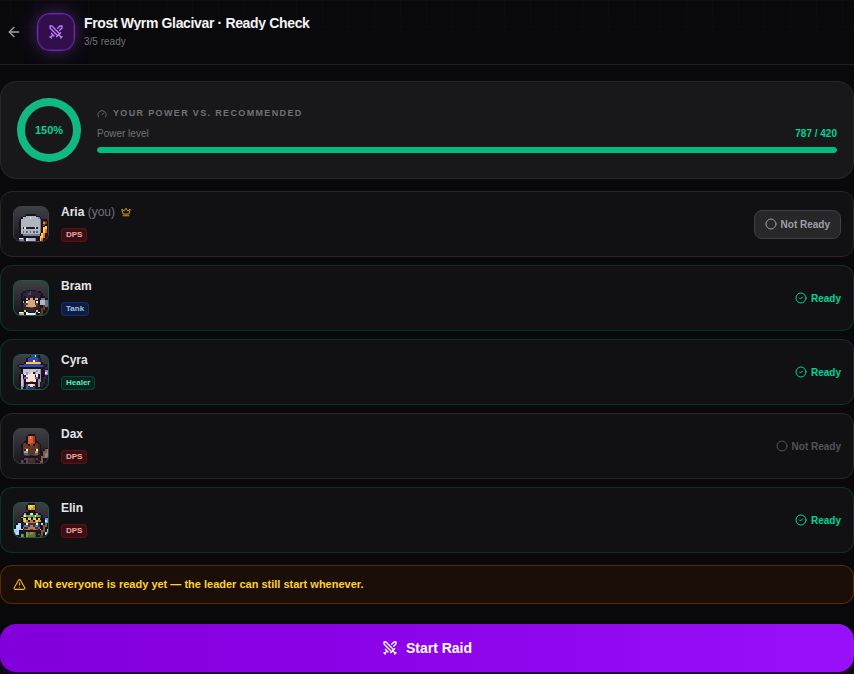 The Ready Check: your Power against the recommended Power, and who's ready
Roles
Your role comes from your equipped gear — change gear to change your role:
- A healing wand makes you a Healer. A bow or a damage wand makes you DPS.
- With a melee weapon (or none), your armor, helmet and boots decide: the role most of them are built for. Tank wins a tie with DPS. Allrounder gear fights as DPS.
- Every equipped piece built for your role adds +4% to that role's job (tank HP and defense, healing, DPS damage).
- A party of two or more without any tank gets one anyway: the DPS member with the most defense steps up. Healers are never pulled off healing.
| Role | What it does |
|---|---|
| Tank | The boss aims about 75% of its single-target hits at tanks. Tanks take 35% less damage. |
| Healer | Heals the most wounded ally once they're below 85% HP, and may resurrect a fallen raider at 30% HP. Low damage. |
| DPS | The most damage, with a 22% critical-hit chance (others have 10%). Crits deal double damage. |
Bring at least one tank and one healer. Without a healer nobody gets healed or brought back.
Your active pet fights too: Strikers attack, Menders heal the most hurt raider, Guardians block part of your damage (see the Pets Guide). Your active fairy adds its elemental damage to every hit.
The Fight
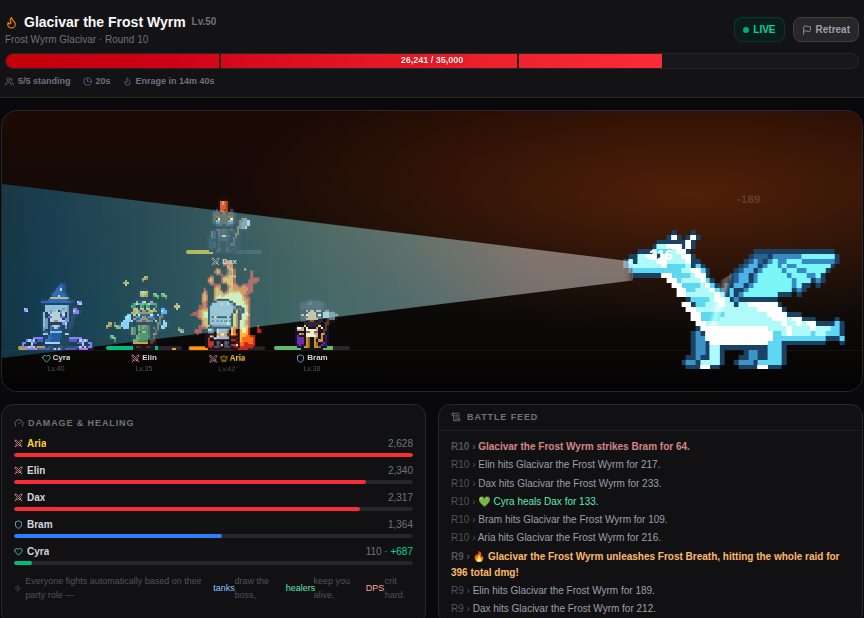 A raid in progress: the boss's HP, the team, damage and healing, and the battle feed
- The battle runs in rounds of 2 seconds. The party leader can speed it up: 2x from level 50, 3x from level 100, 5x from level 200.
- Every 4th round the boss announces a special ability ("…is preparing Frost Breath!"). It goes off the next round. Abilities include:
- Breath / area attacks — hit the whole raid.
- Cleave — hits several raiders at once.
- Execute — hits the most wounded raider hard.
- Drain — damages a raider and heals the boss.
- Summon — calls in adds. The raid always kills the adds before turning back to the boss.
- Bind — freezes (or drowns, or embalms) raiders so they lose 2 rounds.
- Puppet — takes control of a raider for 3 rounds and turns their attacks on their allies.
- Regrow — the boss heals part of its HP.
- Enrage abilities — permanently raise the boss's damage.
- Many bosses have phases. When a phase starts, the boss hits 15% harder and calls in more adds. Some bosses change form and get a fresh HP bar.
- Some raids have an enrage timer (shown under the HP bar). When it runs out the boss goes BERSERK: +50% damage, 10% more every round, and its hits can kill anyone in one blow. Bring enough damage to finish it in time.
- The raid is won when the boss dies, or wiped when every raider is down. The party leader can also Retreat, which ends the raid.
Rewards
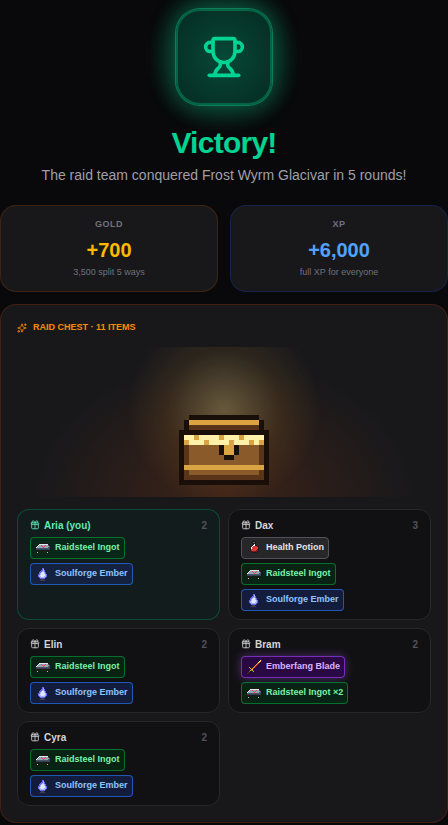 Victory: Gold and XP for every raider and the shared Raid Chest
- Gold and XP — each raider gets a share of the boss's reward. The boss is tuned for 5 raiders, and each gets 20%. Smaller parties get a little more each: 21% with 4, 22% with 3, 23% with 2 and 24% solo.
- Raid Chest — the raid's loot table is rolled once. Each item goes to a random raider with room for it, and pieces of the same drop are spread across the team first. Stacks (materials, potions) are split fairly.
- Raid gear rolls better rarities than travel drops (up to Legendary), and every rarity step adds a bonus affix.
- Pet eggs and Evolution Stones are rolled for every raider separately (see the Pets Guide).
Tips
- Check the Power gauge before you start. Under 100% is risky.
- Make room in your bag. Loot only goes to raiders with a free slot.
- Check your gear before you go: the role it gives you is shown on the Party page.
- Watch the battle feed for telegraphs — it tells you what's coming.
- A wipe costs the Raid Key, so start when the team is ready.
Numbers on this page may change with balance updates.
Want to see it in action?
Play free